
This article contains some general information about uploading and embedding media in posts and pages. More information about the Media Library can be found in the WordPress Codex article of that name.
A word of warning: media is complicated. The history of media on the web is a messy one, marked by lots of different groups pushing forward in different directions at different speeds. As a result, what we have is a patchwork of different technologies that must work together. Getting media to play effectively on a webpage often requires patience and determination (especially for novices). The more you learn about media, the easier it will become.
How Do I Add Media to a Page or Post?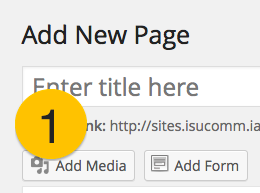
As with other WordPress functions, there are several ways to add media files (images, videos, files, etc.) to a post or page. Just the most commonly used method is described here. To begin, from the Edit Page or Edit Post screen, at the top of the Editor, and:
#1 – Click the “Add Media” button, as shown in the screenshot at right. This will open the Insert Media dialogue box, shown below.
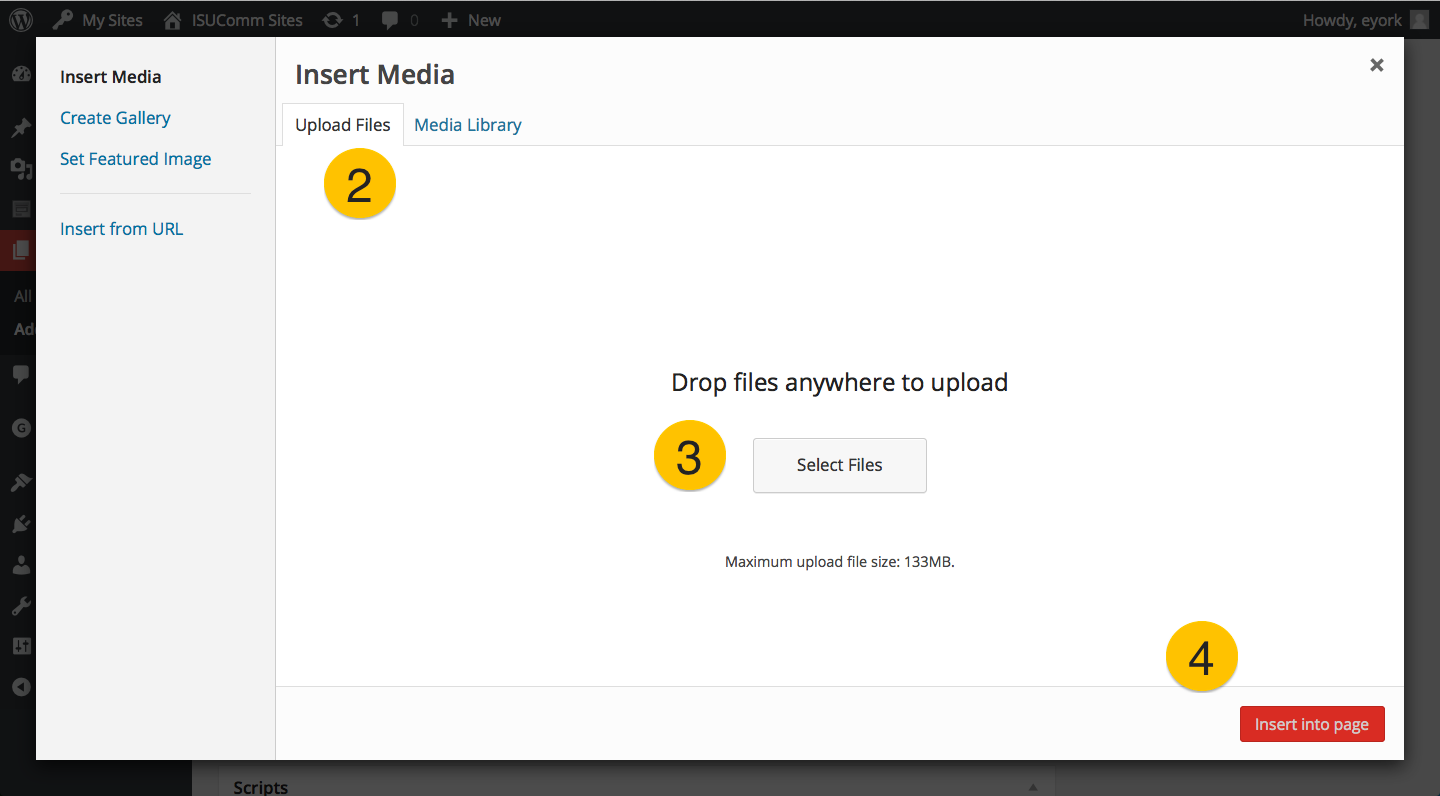
#2 – Click the “Upload” tab from the Media Library dialogue box. This will open a file upload window.
#3 – Click the “Select Files” button to choose a file from your computer.
#4 – Click the “Insert into page” button if you have no further changes to make.
How Do I Change Image Settings?
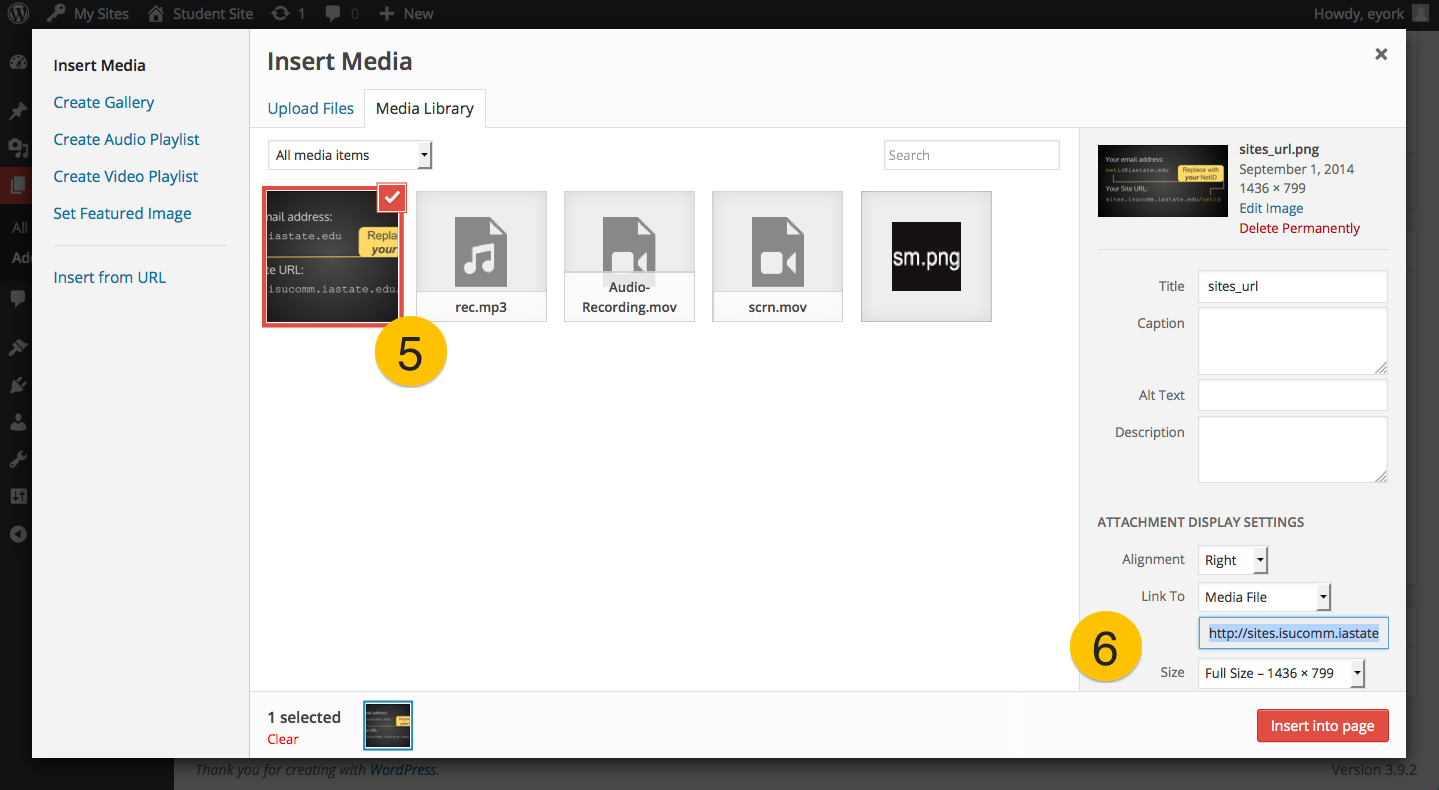
#5 – Select the file whose settings you want to change.
#6 – Configure display settings, including Alignment, Link To, and Size, then click the “Insert into page” button.
How Do I Edit an Uploaded Image?
The Media Library has some basic image-editing capability. You can bring up the editing controls by visiting your library and selecting an image file.
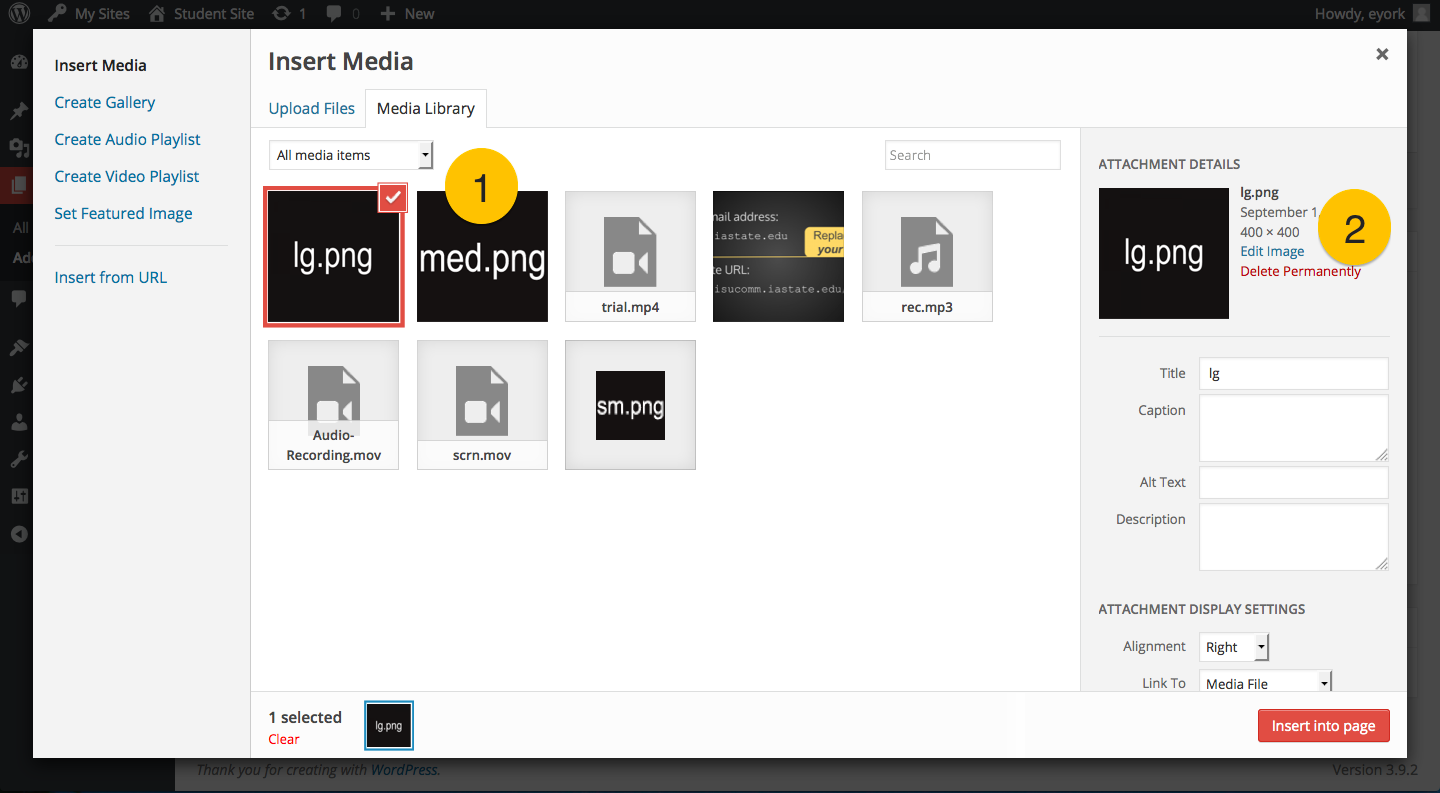
#1 – Select Image by clicking on its thumbnail from the Media Library tab. An image is selected when it displays a check mark. All selected images appear at the bottom of the dialogue box.
#2 – Click the “Edit Image” link in the Attachment Details panel. This will open the Edit Image window.
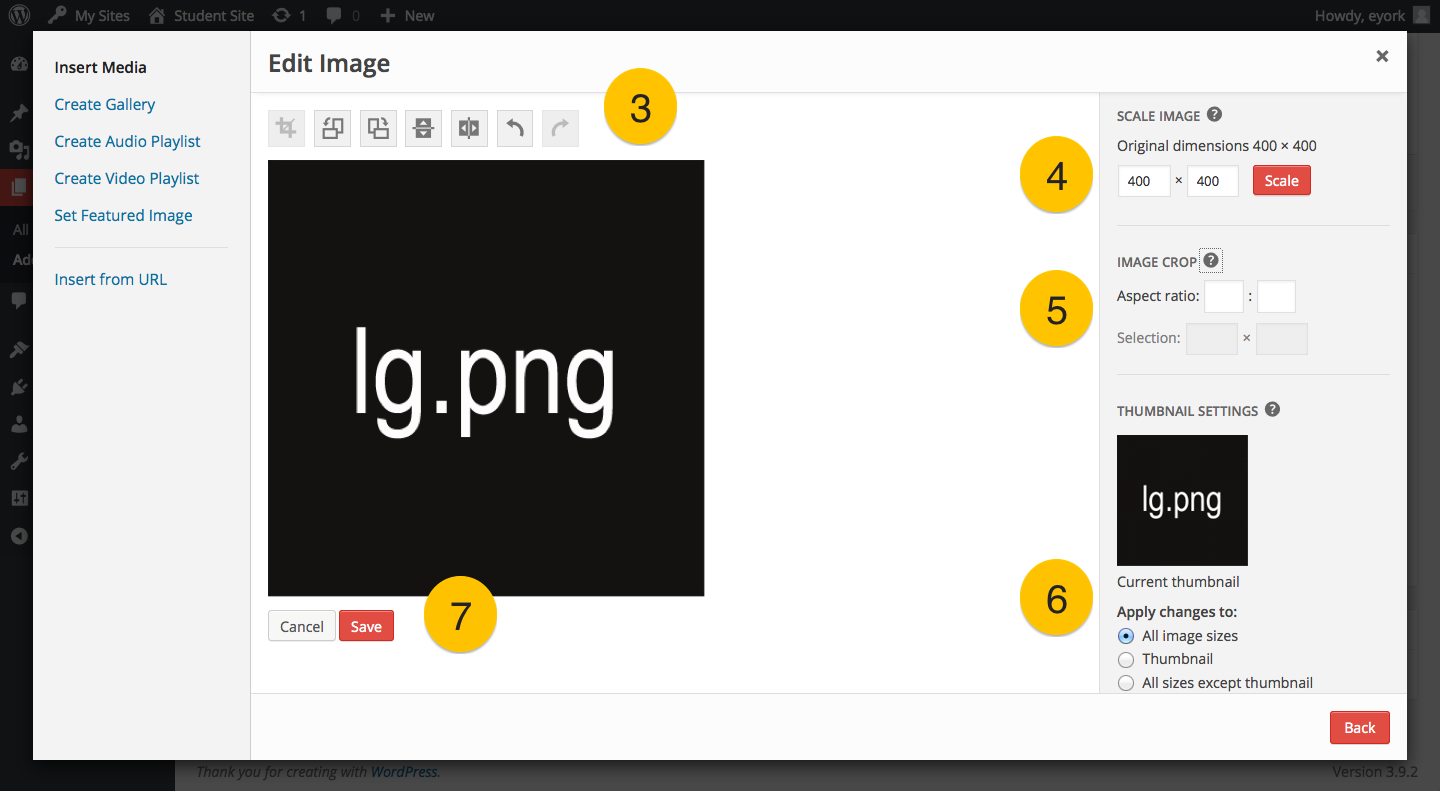
#3 – Rotate or Flip the image using the respective buttons. You can also crop from here if you’ve selected a region.
#4 – Scale the image using these settings.
#5 – Crop the image using these settings.
#6 – Apply the edits to one image or all sizes.
#7 – Click the “Save” button when you’ve finished making changes.
Please note, this editing capability is rudimentary and only meant for optimizing to the page. More advanced editing must be done using a graphics editor such as Photoshop or GIMP.